
Here is how to lay out a book for printing with UBuildABook when you use your own desktop publishing software, such as InDesign, Photoshop, Illustrator, Word or Canva.
Using our FREE Book Design Pro Software or our yearbook software? The layout is handled automatically and you can skip this guide.
Our Book Layout Checklist lists everything to check on your cover file and your inside pages file before you send them, with boxes to tick as you go.
Download the Book Layout Checklist (PDF)
Set your document to the final page size of your book. Our standard sizes are 8.5x11, 8x10, 5.5x8.5 and 6x9 portrait, 11x8.5 and 9x6 landscape, and 8.5x8.5 and 12x12 square. If your book is not the correct size, you must change the page size of the document. It will not work if you only change the margins. Reformatting is something you must do before you send us your files.
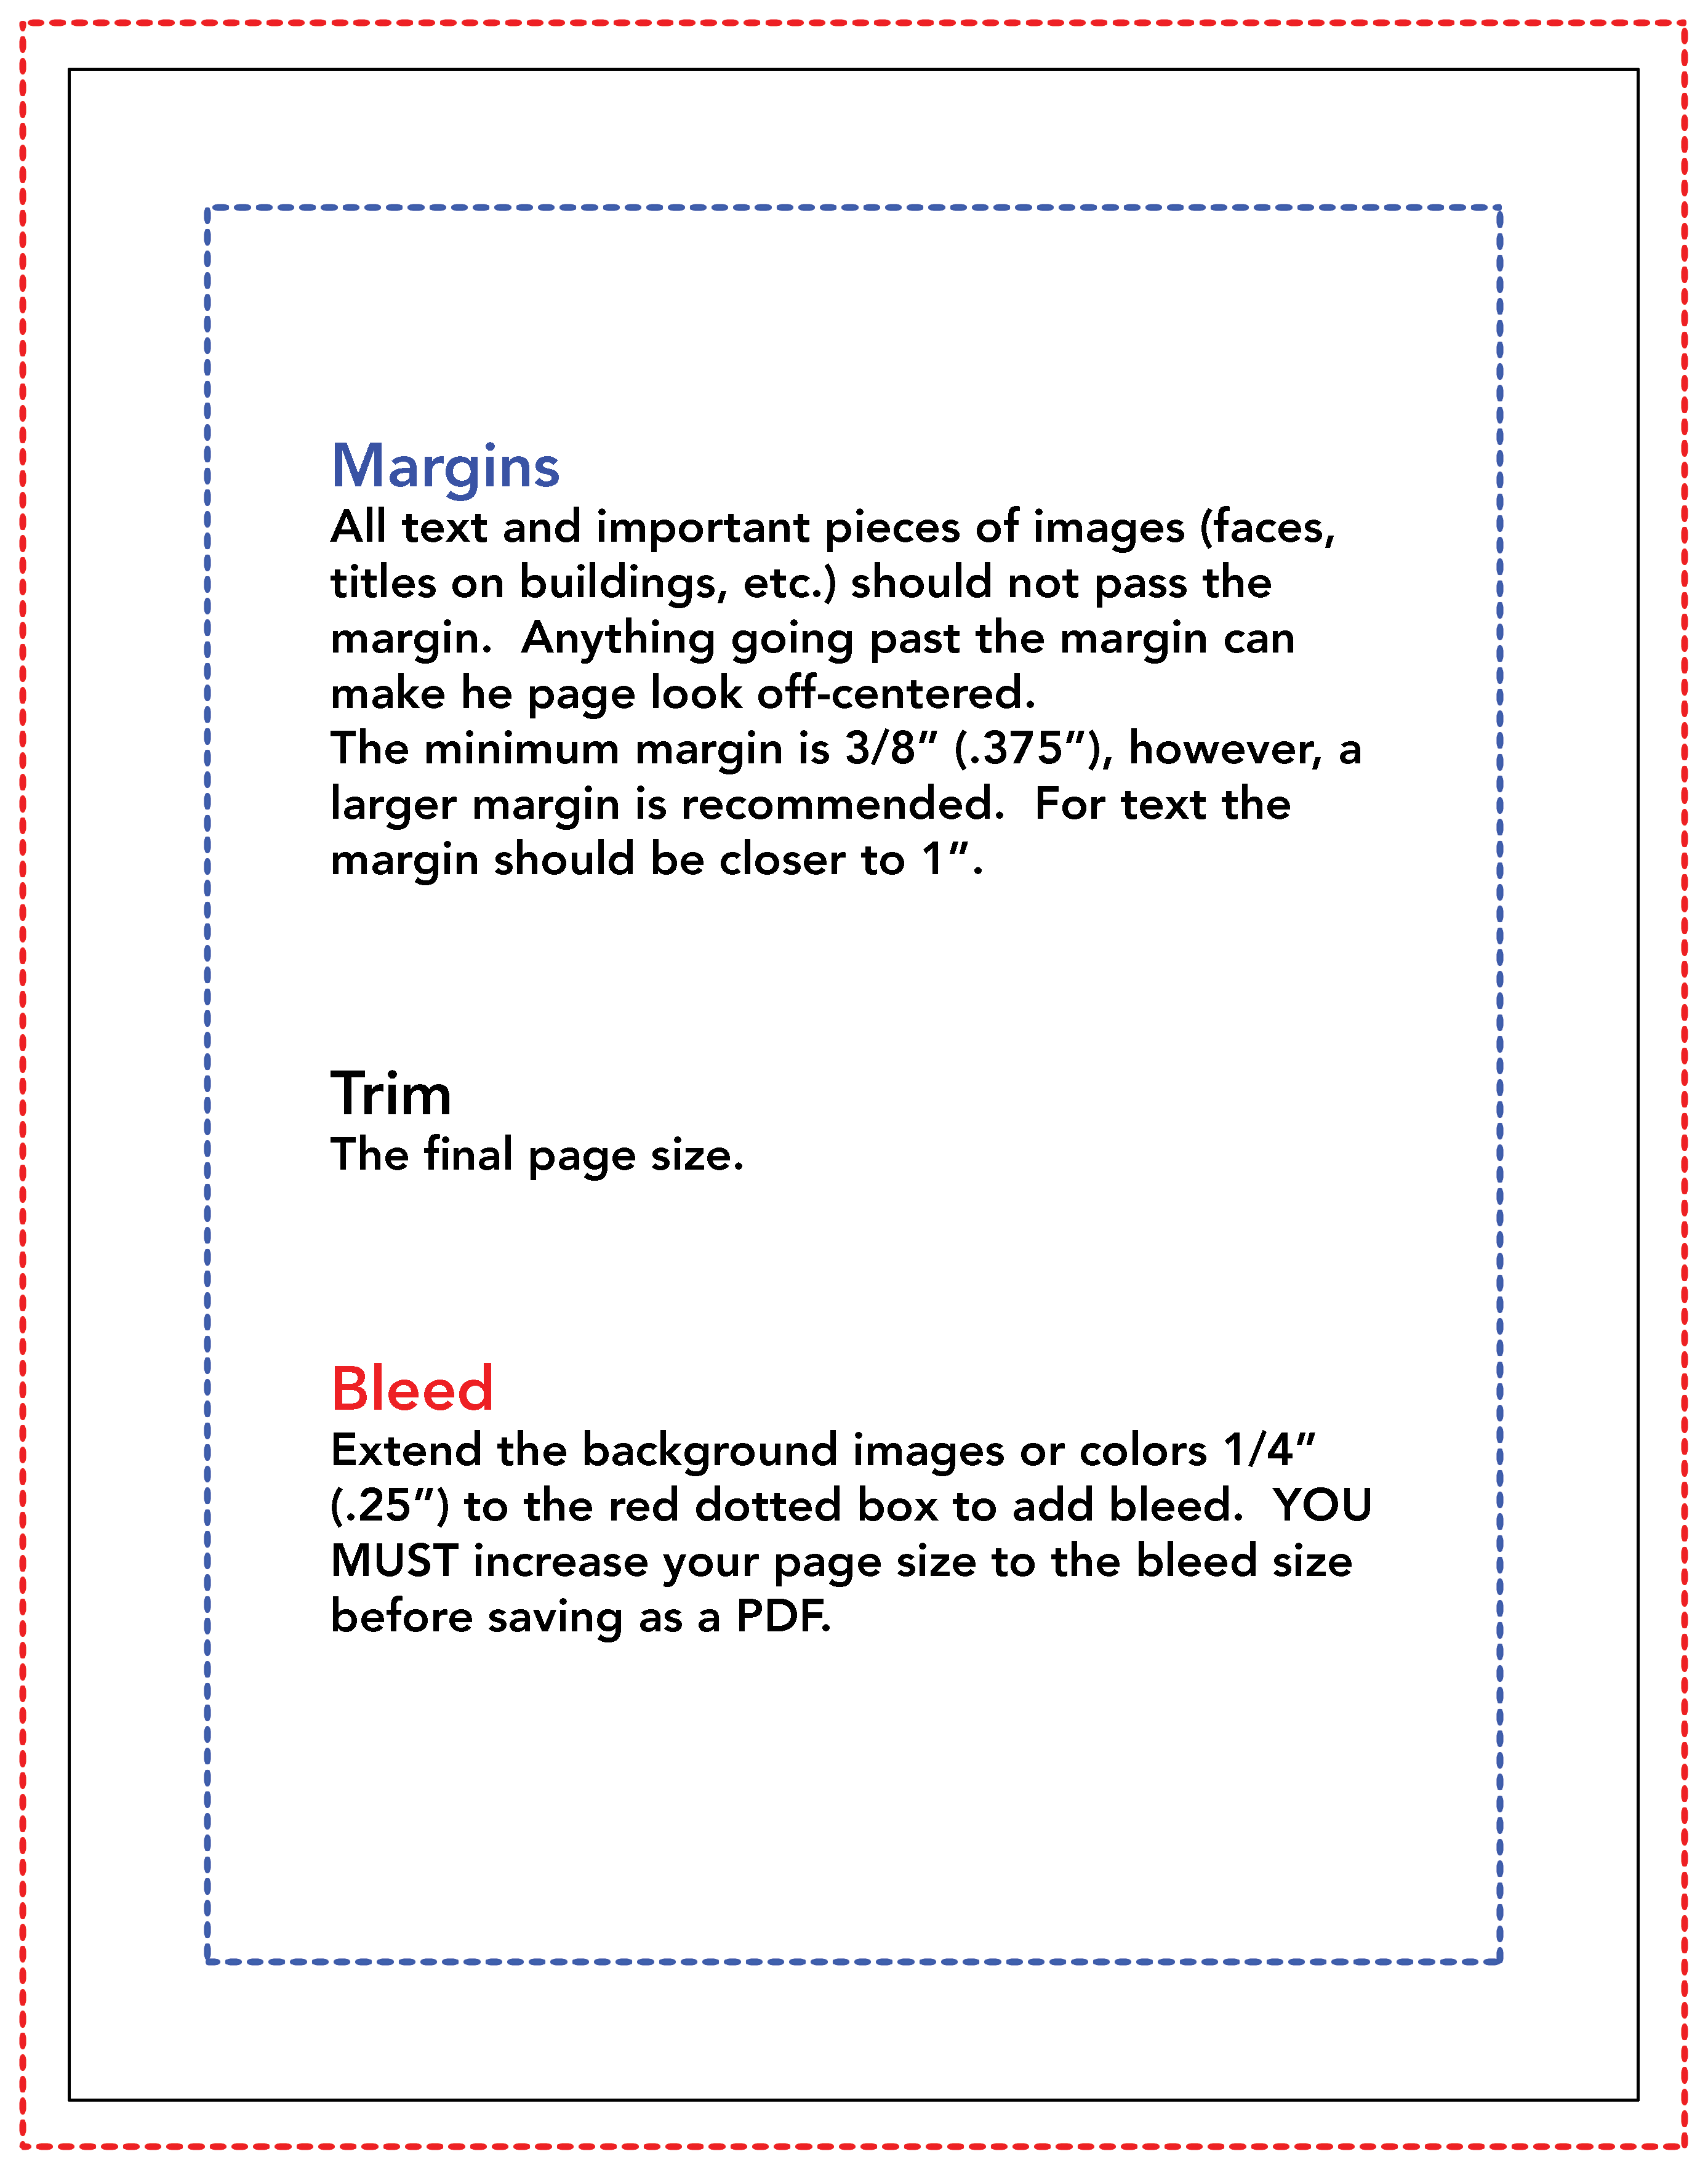
All text and important pieces of images (faces, titles on buildings and so on) should stay inside the margin. Anything left outside may be lost in the bind or the trim. The minimum margin is 3/8. A larger margin is recommended: use 1/2 to 3/4 to get the standard margin of a book, and allow 1/4 extra on the binding side of each page so the page looks centered.
| Trim size (final page size) | Minimum safe zone |
|---|---|
| 5.5x8.5, 8.5x5.5 | 4.75x7.75, 7.75x4.75 |
| 6x9, 9x6 | 5.25x8.25, 8.25x5.25 |
| 8.5x8.5 | 7.75x7.75 |
| 8.5x11, 11x8.5 | 7.75x10.25, 10.25x7.75 |
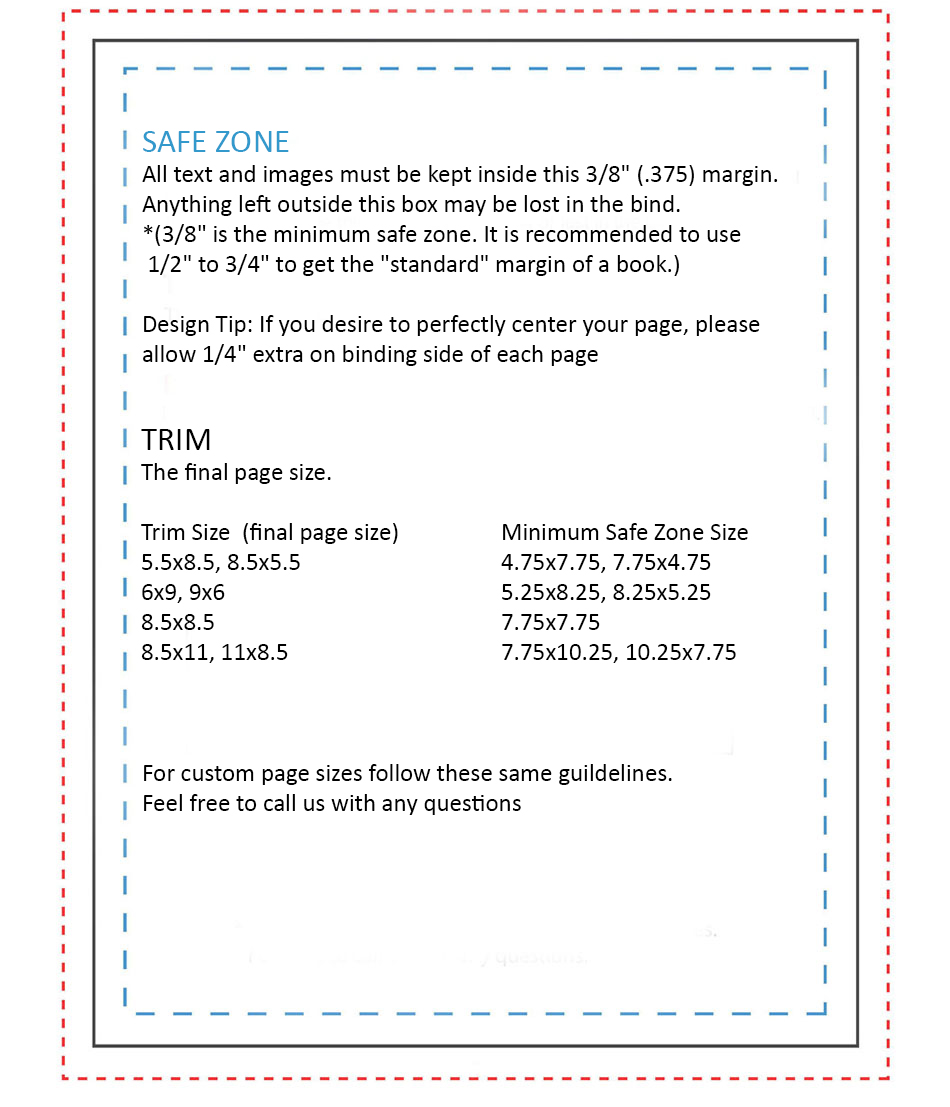
Bleed is when any printed object (background, pictures and so on) goes to the edge of the page. Extend background images or colors 1/4 past the trim on the outer edges. You must increase your page size to the bleed size before saving as a PDF. Custom size books follow the same guidelines.
To make a picture run seamlessly across two pages, crop it so it overlaps the center by 1/2 (1/4 from each side). The overlap allows for the 1/4 bleed and the 1/4 safe zone that is lost in the bind.
For good printing results, all images should be at least 200 DPI. For best printing results they should normally be 300 DPI. PowerPoint saves pictures at 72 DPI by default, which is too low for a high-quality book; set picture compression to the highest (printing) setting, or rebuild the file in a program that supports 300 DPI.
The cover is a separate file: back cover, spine and front cover in one piece. First find your spine size with the spine calculator, then download the matching cover template.
| Soft cover | Hard cover | |
|---|---|---|
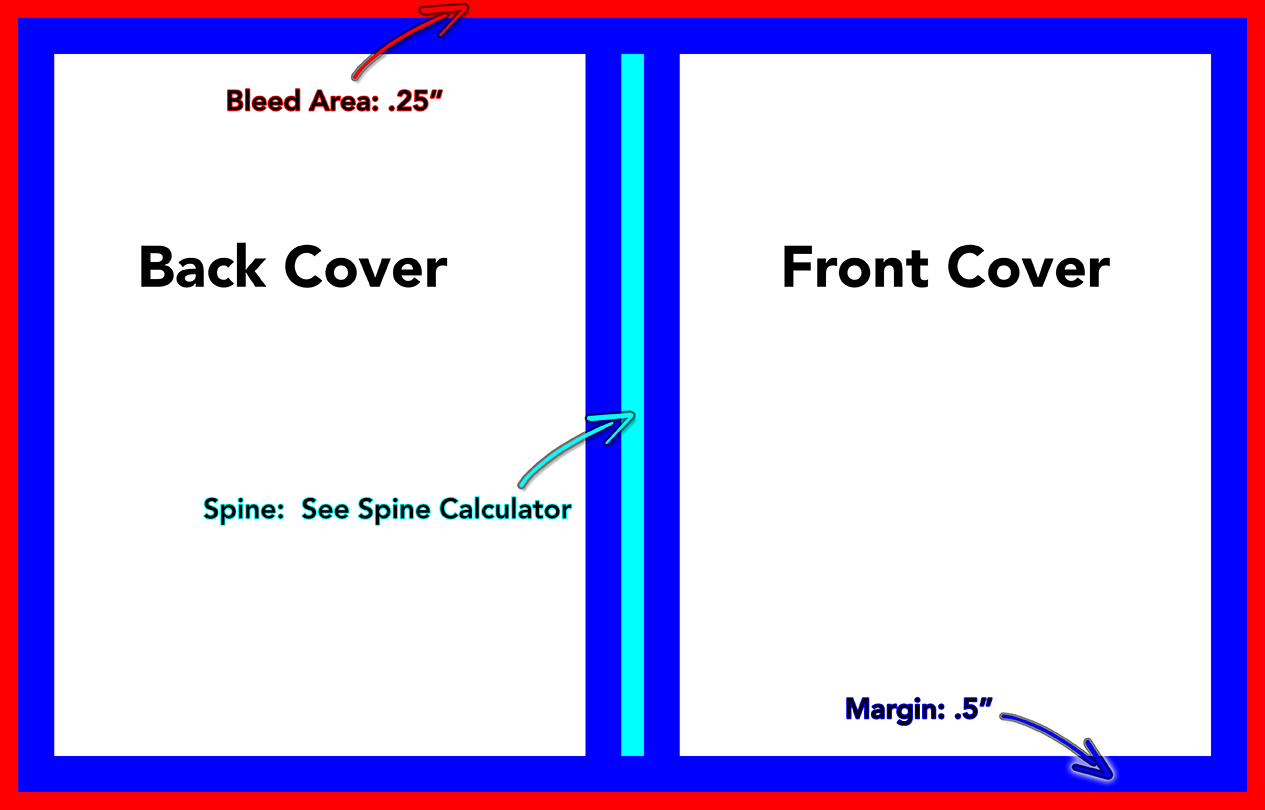
| Bleed | 1/4 around the outer edges | 5/8, much bigger than the inside pages |
| Recommended margin | 1/2 | 1/2 between the safe area and the bleed; it also marks the hinge |
| Cover size | Final trim is 1/8 smaller on the width and 1/4 smaller on the height than the page size, so the cover is flush with the pages | Front and back covers are 1/4 bigger than the page size (an 8.5x11 book has an 8.75x11.25 cover) |
| Safe area | Inside the 1/2 margin | 3/4 smaller than the page size (7.75x10.25 on an 8.5x11 book) |
| Spine text | When the spine is 5/16 or larger | Place anything on the spine you wish |
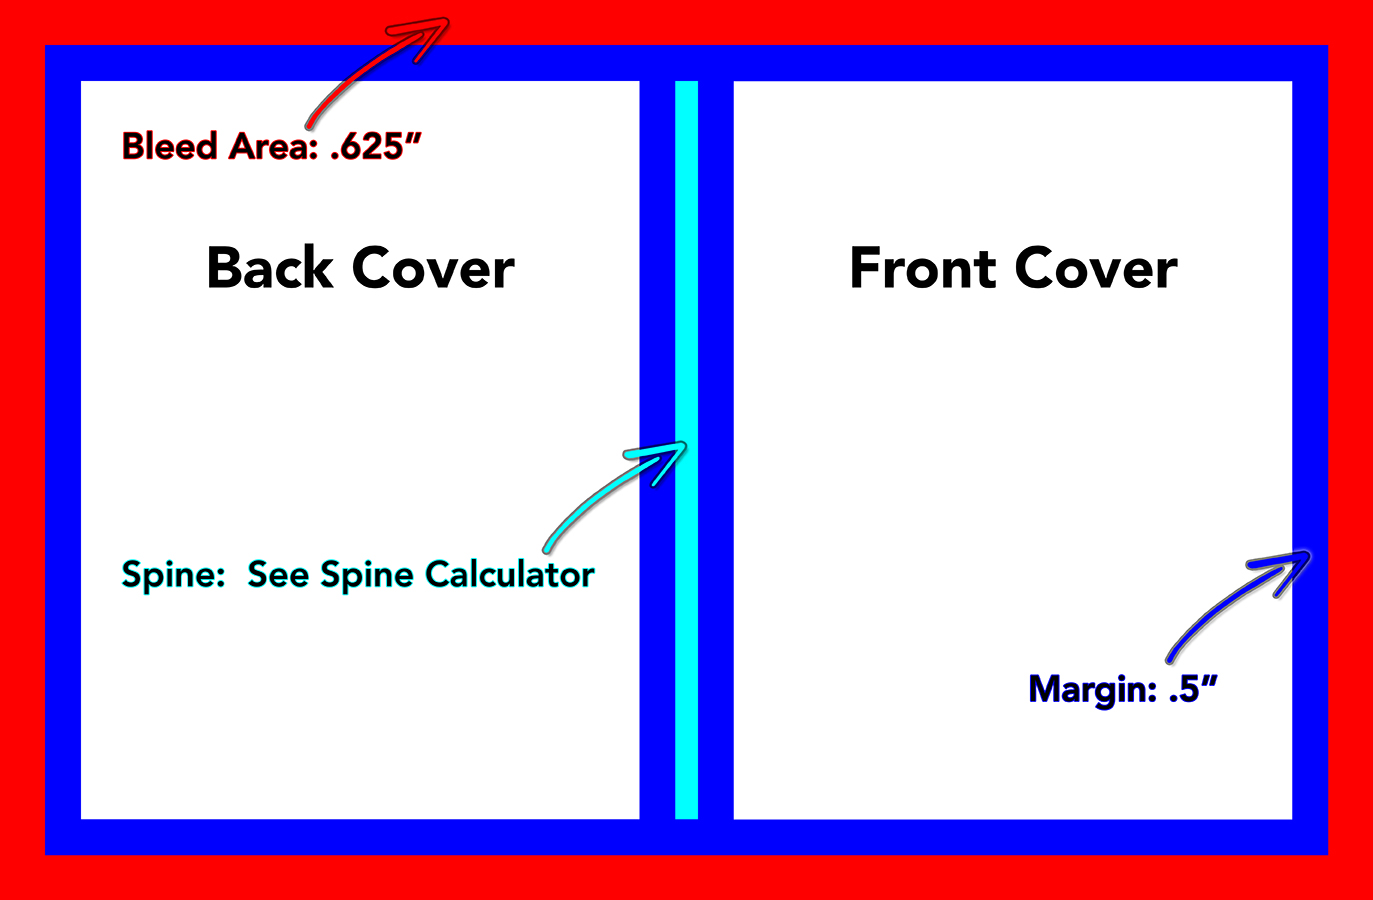
On a hard cover, the bleed wraps around to the inside of the cover, and the hinge lets the cover open and close. Bleed the background across the entire cover, and center text and other objects inside the safe area.

Set the document to the final page size. Use margins of at least 1/2 on all sides plus an extra 1/4 on the binding (inside) side, using Word's Mirror Margins option. Keep everything out of the 1/4 safe zone on all four sides so no text is cut off when the book is trimmed. The most common font is Times New Roman, 12 pt, but it is up to the author. Or start from our free Word page templates.
We accept files in PDF format only. Flatten files made with layers (Photoshop, InDesign and so on). In Word, use Save As and choose PDF. Send two files: the cover and the inside pages. See how to create a PDF file, then send your files.
We accept files in PDF format only. If the file was created with a program using layers, such as Photoshop or InDesign, flatten the file before sending it to us.
Inside pages need 1/4 of bleed on the outer edges when pictures or backgrounds run to the edge of the page. Soft cover files need 1/4 of bleed around the outer edges, and hard cover files need 5/8.
Keep all text and important parts of images at least 3/8 from the edge of the page. We recommend 1/2 to 3/4, plus an extra 1/4 on the binding side.
For good printing results all images should be at least 200 DPI. For best results they should normally be 300 DPI.
No. The cover is a separate file from the inside pages.
Use the spine calculator, then download the matching cover template.
Yes. Set the page size to the final size of your book, use Mirror Margins, and Save As PDF when finished. Our free Word page templates are already set up this way.
If you use our FREE Book Design Pro Software or any of our yearbook software options, the book layout is handled automatically within the software.
Price 1-49 books instantly, or request a custom quote for 50 or more. A real person sends custom quotes, normally within 1 business day.